Vendor Collaboration in Microsoft Dynamics 365 Finance and Operations
Vendor collaboration is a process where you grant access to your vendors to review, accept, and reject RFQs and purchase orders, perform vendor invoicing, and work with consignment stock. Since Dynamics 365 Finance and Operations is a web-based application, you can easily allow vendors to work directly in the system without requiring EDI.
Setup
The following configuration must be completed before using vendor collaboration.
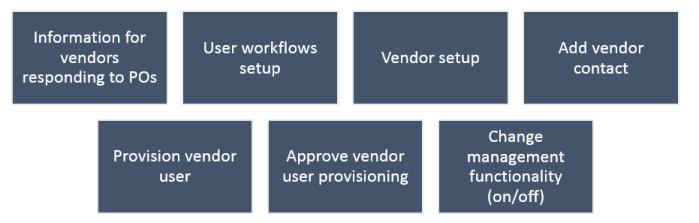
Information for Vendors Responding to POs
Navigate to Procurement and sourcing > Setup > Vendor collaboration > Information for vendors responding to POs. Click New to create a new response, select a Type of response, and enter the Information message in the Details section.

User Workflows
Navigate to System administration > Workflow > User workflows. Create a new workflow with the Vendor user request (new user or modify user) type.

Vendor Setup
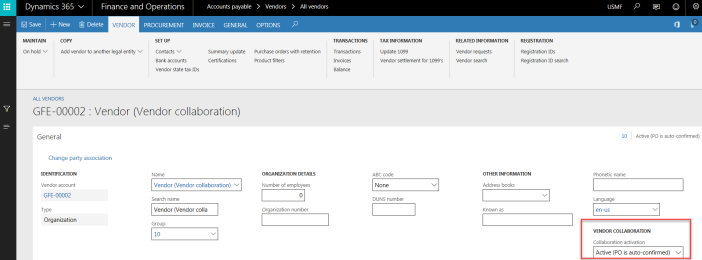
Navigate to Accounts payable > Vendors > All vendors. On the General FastTab, select a value in the Collaboration activation field:
- None — Vendor collaboration is inactive for this vendor.
- Active (PO is auto-confirmed) — Purchase orders are automatically confirmed if the vendor accepts without changes.
- Active (PO is not auto-confirmed) — Purchase orders are not auto-confirmed; a purchasing agent must confirm manually.
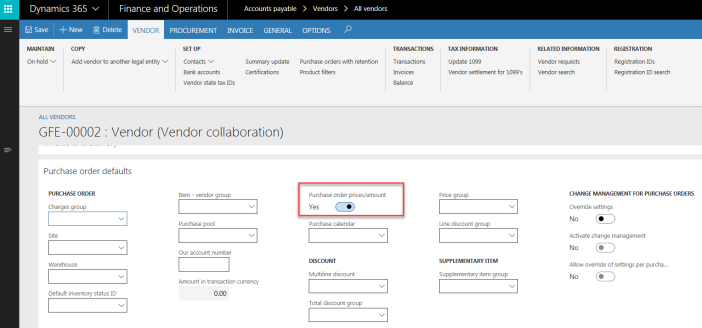
On the Purchase order details FastTab, select the Purchase order prices/amount flag if you want the supplier to see price information.
Add Vendor Contact
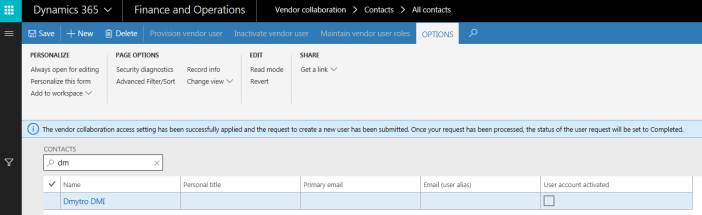
Navigate to Accounts payable > Vendors > All vendors. Click Contacts > Add contacts on the Action pane under the Vendor tab.

Once you add a new contact, click the Provision vendor user button on the Contact tab in the Requests section.

Provision Vendor User
By provisioning a vendor user, the contact will be created as a user with access to D365 to perform activities such as approving purchase orders. In the Provision vendor user form, set the Vendor collaboration flag and select the roles to assign.

Click Submit. A new vendor user request will be created.
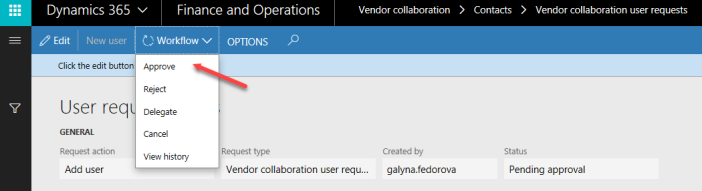
Processing the User Request
Navigate to Vendor collaboration > Contacts > Vendor collaboration user requests. The request displays with Submitted status and the workflow begins.
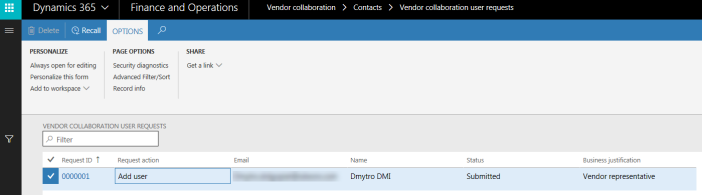
Open the details to check the roles assigned to the user.

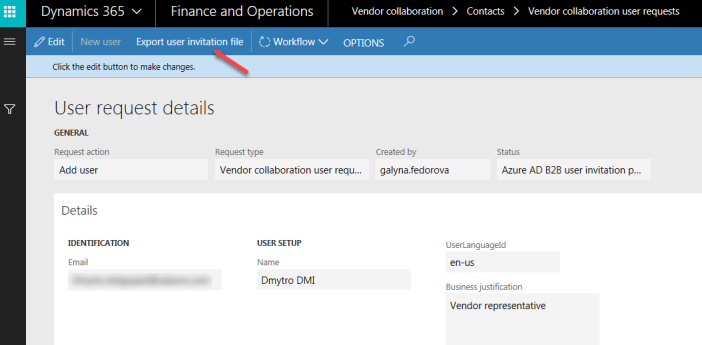
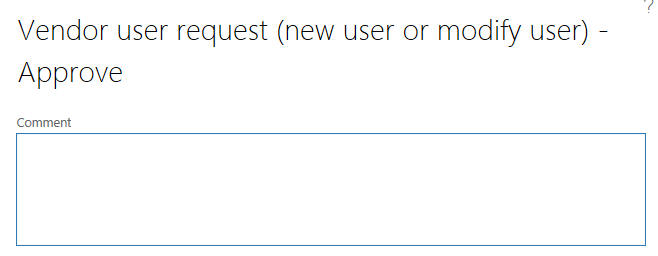
Approve the request via Workflow > Approve.

The status changes to Pending approval, then after workflow execution to Azure AD B2B user invitation pending. A new Export user invitation file button becomes available, exporting a CSV with connection information.
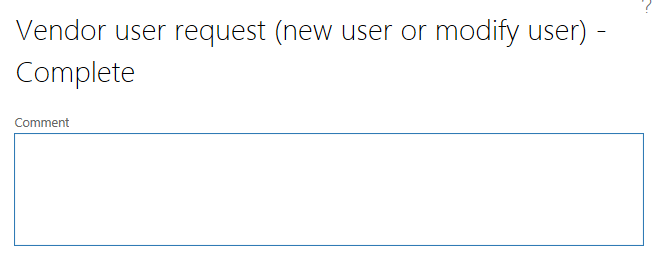
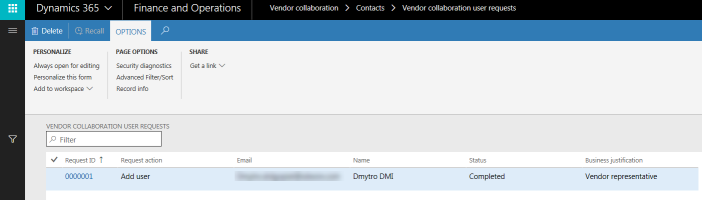
Complete the workflow via Workflow > Complete.
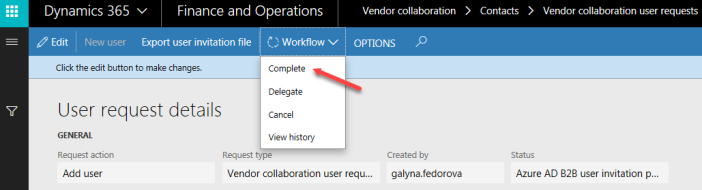
The status returns to Pending approval and the Approve creation of AX user task starts. Approve via Workflow > Approve.
The completed workflow activity follows this sequence: conditional decision evaluation, approve new user request, send Azure AD B2B user invitation, approve creation of AX user, automated provision user, and notify new user.
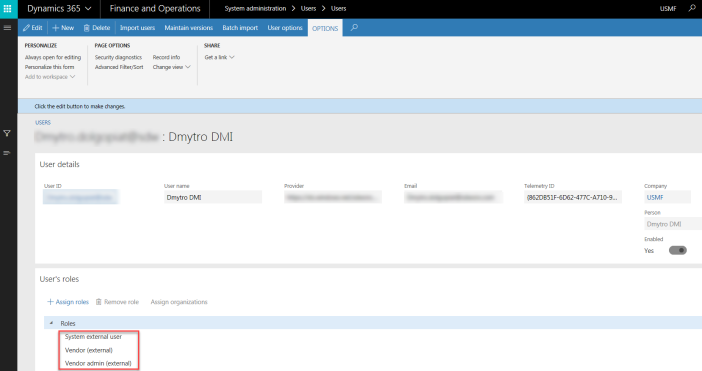
Navigate to System administration > Users > Users to confirm the new user has been created with the assigned roles.
Vendor User Experience
Logging in as the provisioned vendor contact, the following workspaces are available:

Only the Vendor collaboration module is accessible.

Walkthrough — Purchase Order Confirmation
For this example, the Change management parameter is kept off. For change management functionality, see D365 Change management.
Create a new purchase order via Accounts payable > Purchase orders > All purchase orders. The status will be set to Approved.
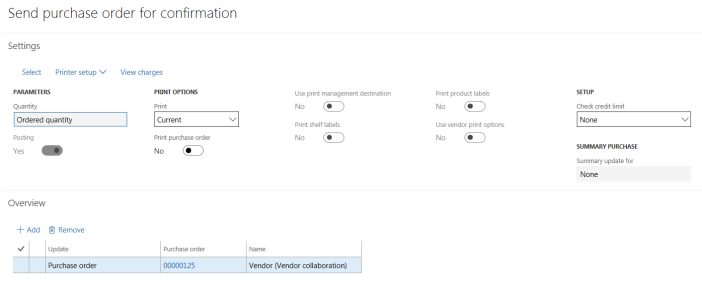
Send for vendor confirmation by clicking Send for confirmation on the Purchase tab in the Vendor collaboration section.
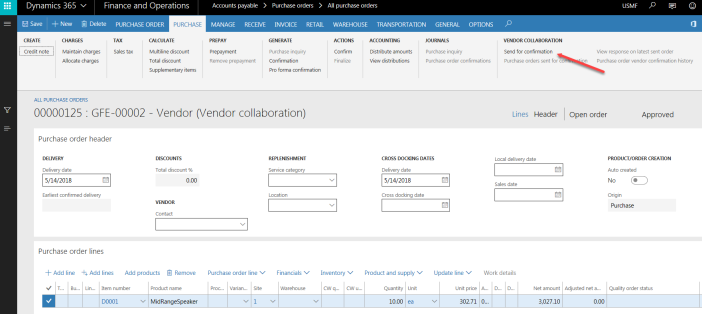
Click OK on the confirmation form.
The status changes to In external review.

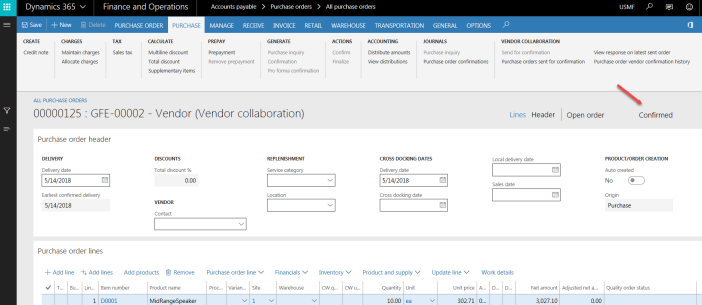
Log in as the vendor contact and navigate to Vendor collaboration > Purchase orders > Purchase orders for review.

Approve the purchase order by clicking Accept, then OK.

The information message configured in the setup is displayed.

The status changes to Confirmed.
Purchase Order Status Flow
The general status flow of purchase orders through vendor collaboration: